8 Things Every Local Band Technical Rider Needs
Last Updated: November 12, 2026
Quick Summary
A technical rider is a one-page document covering eight sections: contacts and timing, lineup and stage positions, stage plot, input list, backline, microphones and DI boxes, monitors and front of house, and lighting notes. Keep it to one page, label who supplies each item, and send it with your first booking inquiry.
- Put your technical contact first, with one name, phone number, and email.
- Number channels drums first, then bass, guitars, keys, and vocals last.
- List every gear item with an owner: we bring or venue provides.
- Give each item a must-have and an acceptable alternative so venues can flex.
- Send the rider with your initial inquiry, not after the contract.
Table of Contents
- Why a One-Page Technical Rider Beats a Twenty-Page Demands List
- How to Make a Tech Rider: The 8 Sections That Matter
- Your Band Stage Plot and Input List, Built Together
- Backline, Microphones, and DI Boxes: Who Brings What
- Monitors, Front of House, and Lighting Notes
- A Band Technical Rider Example for Three Common Setups
- Downloadable Technical Rider Template You Can Copy
- Send Your Rider Before the Venue Books the Date
- Frequently Asked Questions
Why a One-Page Technical Rider Beats a Twenty-Page Demands List
A technical rider is a one-page document that tells the venue and sound provider exactly what your band needs: contacts, stage layout, inputs, backline, monitors, and lighting.
Long riders get skimmed. Short ones get read.
Most local shows run on tight changeovers. The sound engineer has minutes, not an afternoon, to understand your setup. A clean one-pager gets you a proper soundcheck.
- One page, one column, no fine print
- Essentials first, preferences last and clearly labeled
- Written for a stranger who has never seen your band
Below, we break down the eight sections that matter, with a template you can copy today.
How to Make a Tech Rider: The 8 Sections That Matter
To make a tech rider, write eight short sections: contacts and timing, lineup and stage positions, stage plot, input list, backline, microphones and DI boxes, monitors and front of house, and lighting notes. Each answers one question the venue will ask.
Here is the order we recommend, and why it works:
| Section | Answers | Keep It To |
|---|---|---|
| Contacts and timing | Who do we call, and when? | 3 lines |
| Lineup and positions | How many people, where? | 1 short list |
| Stage plot | What goes where? | 1 drawing |
| Input list | What gets plugged in? | 1 numbered list |
| Backline | Who brings the amps and drums? | 1 short list |
| Mics and DI boxes | What does the venue supply? | 1 checklist |
| Monitors and FOH | What do we hear? | 2-3 lines |
| Lighting notes | What do we need to see? | 1-2 lines |
That is the whole document. Everything else is a bonus.
Contacts and Show-Day Timing
Put your technical contact first, not your booking agent. The person who answers texts at 4 p.m. on show day is the one the venue needs.
Include:
- One name, one phone number, one email
- Your set length and preferred changeover window
- Arrival and soundcheck time you are requesting
A common mistake is listing three contacts with no labels. The venue calls the wrong person, and your soundcheck slot disappears.
Lineup, Performer Count, and Stage Positions
State the number of performers and what each one does. This tells the venue how many monitor mixes and microphones to plan for.
Example:
- 4 performers: lead vocal and guitar, bass, keys, drums
- Lead vocal stands center stage
- Keys stage left, bass stage right
If your lineup changes between shows, update the rider the same week. A stale performer count is worse than no count, because the venue plans around wrong information.
Your Band Stage Plot and Input List, Built Together
Build the stage plot and input list at the same time, because they describe the same stage from two angles. The stage plot shows where things sit. The input list shows what plugs in.
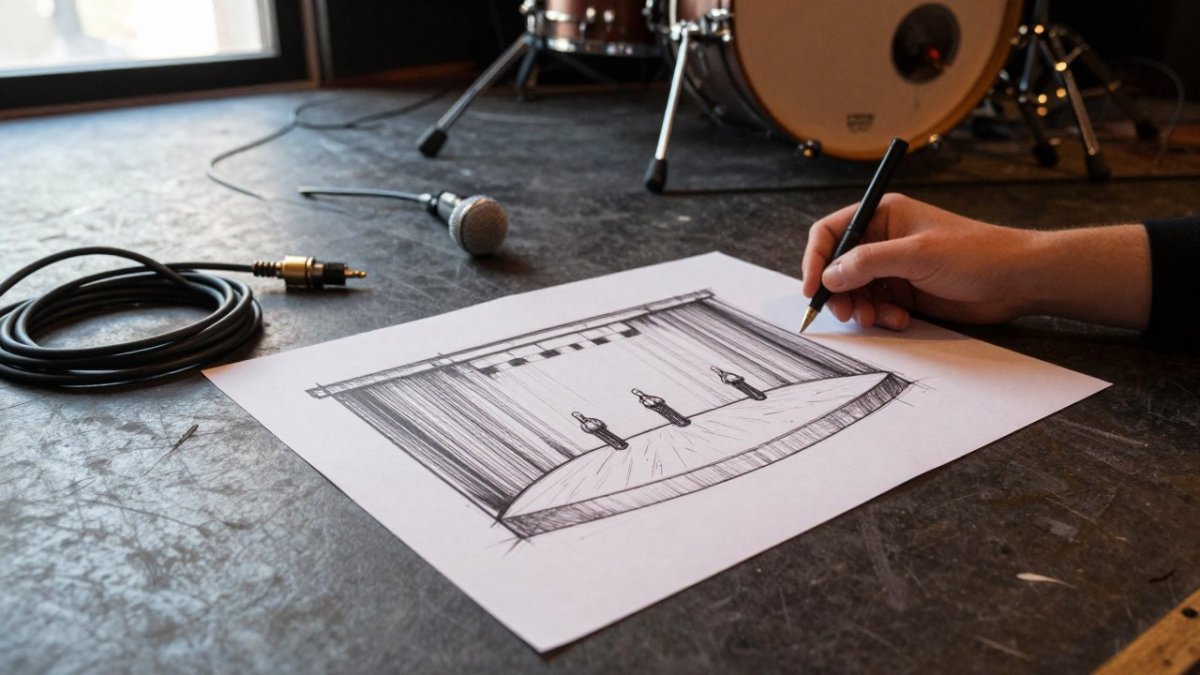
A stage plot and input list that disagree cause the most common load-in delay we see: the engineer patches channel 3 for a vocal that is actually stage left on the drawing.
Keep the plot simple:
- Label each performer position
- Mark power drops and DI box locations
- Note any risers or step needs
Channel Order and Numbering
Number channels in the order the engineer will patch them, usually drums first, then bass, guitars, keys, and vocals last. Keep that channel order identical on every document you send.
- Channel 1: kick drum
- Channel 2: snare
- Channel 3: bass DI
If you use the same channel list every show, your regular engineer learns it once and never asks again.
Backline, Microphones, and DI Boxes: Who Brings What
Spell out ownership for every item. The single most common rider failure is a silent assumption about who supplies the drum kit or the bass amp.
Write it as two lists:
- We bring: drum kit, bass amp, guitar amps, keys and stand, pedalboards
- Venue provides: drum mics, mic stands, DI boxes, cables, vocal mics
If a venue cannot supply something, you need to know before load-in, not at 6 p.m. Bands confirming rental inventory ahead of time can check PA, lighting and wireless mic rentals.
Watch out: never list an item without an owner. "Drum kit" alone tells the venue nothing, and both sides may show up without one.
Must-Have vs. Acceptable Alternative
A flat gear list forces a yes-or-no answer. A must-have/acceptable-alternative format lets a venue meet your needs with what it owns, which matters most on small stages with modest inventories and volunteer crews.
For each line, give one must-have and one or two acceptable alternatives:
| Item | Must-Have | Acceptable Alternative |
|---|---|---|
| Kick mic | Dedicated kick drum mic | Any large-diaphragm dynamic mic on a short stand |
| Vocal mic | Cardioid dynamic vocal mic | Any cardioid dynamic handheld |
| Bass | Amp mic or bass DI | Venue DI into house system |
| Guitar | Amp mic | Amp sim pedal direct to house |
| Monitors | 3 wedge mixes | 2 mixes plus side fill |
| Drum kit | Full 5-piece kit | House kit with your snare, cymbals, and pedal |
This format tells the venue where you can flex and tells you where you cannot. A band that needs a specific vocal mic for a quiet-voiced singer should say so plainly; a band that can play through any working bass DI should say that too.
Scaling for Small Stages and Volunteer Crews
Small rooms and volunteer-run sound teams rarely have the full package. Build a reduced version of your list so the venue has a fallback that still works.
- Reduced channel count: decide in advance which inputs you can drop. A four-piece rock band can usually survive on kick, snare, one overhead, bass DI, one guitar, and two vocals, seven channels instead of ten.
- Shared mics: if the venue is short on stands, plan for one vocal mic per two singers.
- House backline: ask whether the venue keeps a house drum kit or bass amp. If it does, list which pieces you still bring (snare, cymbals, pedal, bass head).
Watch out: a reduced list is not a license to under-specify. Mark clearly which items are essential and which are preferred, so a volunteer crew does not cut the one input your set depends on.
Contingency Plans for Missing or Failed Gear
Equipment fails and rentals fall through. A short contingency block saves the show.
- Substitution rules: note which mics and DIs can swap without changing your mix.
- Failure fallback: if a monitor mix dies, decide who gets the working mix first, usually the lead vocal.
- Spares: list the one or two items you always carry a spare of, such as a vocal mic cable, a DI box, or a spare pedal power supply.
A rider that names its own fallbacks reads as professional, not demanding, and gives a volunteer crew a clear path when something breaks mid-set.
Monitors, Front of House, and Lighting Notes
Monitors and front of house are where small stages get difficult. Most local venues have a limited number of monitor mixes, so say what you actually need to hear.
- How many monitor mixes you want
- Whether you use wedges or in-ear monitors
- Who needs which instrument in their mix
If your band runs in-ears, say so early. Rental options for wireless in-ear monitor systems let you lock in channels before show day. For rooms needing full PA, our sound system rentals cover delivery, setup, and engineers.
Lighting notes should stay short: enough light to read setlists, no strobes, and any cue you depend on. Two lines is plenty.
A Band Technical Rider Example for Three Common Setups
Here is a band technical rider example you can adapt. The needs change with the room, so start from the closest fit.
Solo acoustic, small room
- 2 inputs: vocal mic, guitar DI
- 1 monitor mix
- Venue supplies mic, stand, DI, and one speaker system
Four-piece rock band, club stage
- 8 to 10 inputs: drums, bass DI, two guitars, keys, two vocals
- 3 monitor mixes
- Band brings amps and drum kit; venue supplies mics, stands, DIs
Six-piece with horns, larger stage
- 14 or more inputs
- 4 monitor mixes
- Band brings backline; venue supplies full mic package and DIs
Downloadable Technical Rider Template You Can Copy
Copy this template and fill in the blanks. It fits on one page.
BAND: [name] TECH CONTACT: [name] | [phone] | [email] SET LENGTH: [minutes] | SOUNDCHECK: [time requested]
LINEUP: [number] performers
- [name] - [instrument] - [stage position]
STAGE PLOT: [attached / described below]
INPUT LIST:
- [source] 2. [source] 3. [source] ...
BACKLINE: We bring: [list] Venue provides: [list]
MONITORS: [number] mixes, [wedges / in-ears] FOH: [own engineer? yes/no] LIGHTING: [one or two lines] Before you send it, read it as a stranger would. If any line needs a follow-up question, fix it. When you are ready to lock in production support, you can get a free quote and confirm gear against your list.
Send Your Rider Before the Venue Books the Date
Send the rider with your initial inquiry, not after the contract. Venues book dates based on what they can technically support, and a late rider forces a renegotiation.
A practical sequence:
- Send the one-page rider with your first email
- Confirm receipt and ask for venue-provided equipment list
- Reconfirm one week out, with any lineup changes
- Bring two printed copies on show day
For a deeper walkthrough on confirming room specs, see how to verify technical event specs before show day.
A Realistic Advance Timeline
Most local shows are booked weeks out, not months. A workable advance schedule looks like this:
- At inquiry: send the one-page rider and ask two questions, what does the venue supply, and how many monitor mixes are available.
- At booking: get written confirmation of the venue-provided list. A reply email is enough for a local show.
- Two weeks out: reconfirm set length, arrival time, and soundcheck window. Lock lineup changes here.
Bands that send a rider once and never follow up get surprised at load-in when the venue's plans change or gear gets borrowed for another event. The one-week reconfirmation catches most of these problems.
Handling Last-Minute Changes
Lineup changes, gear failures, and schedule shifts happen. Decide in advance how you will communicate them.
- Lineup change: send an updated rider the same day and highlight what changed at the top of the email.
- Gear failure: tell the venue what you are substituting and whether it changes the input list or monitor needs.
- Running late: call the technical contact, not the booking contact, and give a realistic arrival time.
Watch out: a last-minute change sent only to the booking agent may never reach the person running sound. Always copy the technical contact.
What to Confirm in Writing
You do not need a long paper trail, but a few items should be confirmed in writing before show day:
- The venue-provided equipment list
- The number of monitor mixes
- Your soundcheck window and set length
A short confirmation email repeating these five points protects both sides. If something goes wrong on show day, you have a record of what was agreed, and the venue has a clear picture of what you expect.
Getting the rider right is half the battle. The other half is having the right gear and crew show up on time.
At AudioBahn Productions, we handle concert sound, stage lighting, staging, and backline for events across the region, with scheduling and contract management built in.
Frequently Asked Questions
What is the difference between a technical rider and a stage plot?
A technical rider is the full document: contacts, input list, backline, monitor needs, and power. A stage plot is one page inside it that shows where each performer and piece of gear sits on stage. The rider explains what you need; the plot shows where it goes. Venues usually read the plot first because it tells them in seconds whether their stage can hold your band, so keep it on page one of your rider.
How far in advance should a band send its technical rider?
Send it with the contract or hold request, not the week of the show. Venues book sound gear and crew from a schedule, and a late rider means substitutions. Attach the rider to your initial inquiry so the venue can confirm stage capacity and gear availability before either side commits. Follow up about a week out to confirm the input list and load-in time, and bring a printed copy to soundcheck.
Who provides the equipment listed in a band's technical rider?
It depends on what the rider says, which is why the document must label each item as provided or not provided. Most small venues supply a basic sound system, microphones, mic stands, and monitor wedges. Bands usually bring instruments, amplifiers, pedalboards, and often their own vocal mic. DI boxes and cabling fall in between, so state clearly who supplies them. Anything the venue cannot supply, plan to rent or bring.
How detailed should a band's technical rider be?
Detailed enough that a sound engineer who has never met you can set the stage without calling. That means a numbered input list in channel order, a labeled stage plot, and clear notes on monitor mixes. Keep it to two or three pages. Local bands that list twenty preferred microphone models get ignored; bands that list five essentials and mark the rest optional get what they actually need.

Sound, lighting, staging and LED video. Free quote.
Frequently Asked Questions
What is the difference between a technical rider and a stage plot?
A technical rider is the full document: contacts, input list, backline, monitor needs, and power. A stage plot is one page inside it that shows where each performer and piece of gear sits on stage. The rider explains what you need; the plot shows where it goes. Venues usually read the plot first because it tells them in seconds whether their stage can hold your band, so keep it on page one of your rider.
How far in advance should a band send its technical rider?
Send it with the contract or hold request, not the week of the show. Venues book sound gear and crew from a schedule, and a late rider means substitutions. Attach the rider to your initial inquiry so the venue can confirm stage capacity and gear availability before either side commits. Follow up about a week out to confirm the input list and load-in time, and bring a printed copy to soundcheck.
Who provides the equipment listed in a band's technical rider?
It depends on what the rider says, which is why the document must label each item as provided or not provided. Most small venues supply a basic sound system, microphones, mic stands, and monitor wedges. Bands usually bring instruments, amplifiers, pedalboards, and often their own vocal mic. DI boxes and cabling fall in between, so state clearly who supplies them. Anything the venue cannot supply, plan to rent or bring.
How detailed should a band's technical rider be?
Detailed enough that a sound engineer who has never met you can set the stage without calling. That means a numbered input list in channel order, a labeled stage plot, and clear notes on monitor mixes. Keep it to two or three pages. Local bands that list twenty preferred microphone models get ignored; bands that list five essentials and mark the rest optional get what they actually need.